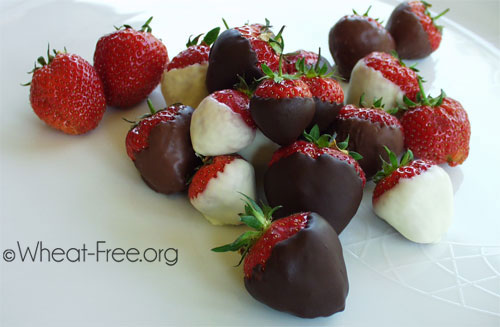
Chocolate covered strawberries recipe
“Great way to get one of your daily portions of fruit”

Allergy Information
| Wheat-Free | |
| Gluten-Free | |
| Nut-Free | |
| Dairy-Free | |
| Sugar-Free | |
| Vegetarian | |
| Vegan |
- Preparation time: 15 mins
- Yield: makes lots
What can be better than fresh strawberries? Fresh strawberries dipped in chocolate!
Chocolate covered strawberries really are the simplest things to make. Serve them either as an elegant dessert at a dinner party, a chocolate disguised way of getting more fruit into your body, a romantic Valentine's Day treat, or just because you want strawberries and chocolate, and you want them both, now!
They won't have a long life, needing to be eaten on the day of dipping, but let's be serious here, chocolate covered strawberries hanging around for more than a day? Never going to happen.
Important note: since the extremely bad experience with strawberries (read For a wheat free dessert how about strawberries?) we would caution the use of strawberries for very sensitive wheat allergy or celiac disease sufferers. If possible make sure that the strawberries used have not been grown on wheat straw, or use another fruit instead of strawberries.
Ingredients (Measures: Metric | US)
Directions
- Choose only the firmest ripe strawberries for this recipe. Strawberries that are overripe or bruised will go mushy, and the chocolate won't set on them very well.
- Gently wash the strawberries, taking care to leave the stalk and leaves intact. Pat the strawberries dry using absorbent kitchen paper making sure that you don't bruise them. Leave the strawberries to stand at room temperature while you melt the chocolate, to ensure that they are completely dry. Even the slightest drop of moisture will spoil the chocolate coating.
- Line a large flat tray with non-stick paper. It needs to be large enough to lay all of the dipped strawberries on without them touching each other while the chocolate sets.
- Break the chocolate into small pieces, and melt (how to melt chocolate). If you are using more than one type of chocolate e.g. dark and white, it's easier to do one at a time.
- Once the chocolate is melted allow to cool slightly, then holding a strawberry by its stalk or leaves dip it into the chocolate. You can dip the strawberry as deep as you wish, but it's more attractive to leave some of the red berry showing at the top.
- The chocolate coating shouldn't be too thick or the strawberry will look very clumsy. If the chocolate is too thin then the texture of the strawberry will show through, and spoil the chocolate effect (as well as shortchanging you on the quantity of chocolate on your berry).
- After dipping the strawberry gently wipe off the excess on the rim of the bowl, this will help to avoid the chocolate ending up in a puddle on the bottom of the strawberry when it is laid on the tray to set. Take care not to wipe off too much though, you don't want a bare patch.
- Lay the dipped strawberry on its side on the lined tray and allow to set. You will need to find somewhere cool for them to set. Try to resist the temptation to put the tray in the fridge as the strawberries and the chocolate will sweat when they are removed and returned to room temperature. Also you don't want the chocolate to be too brittle as it will shatter off the strawberry when you bite into it, spoiling the effect.