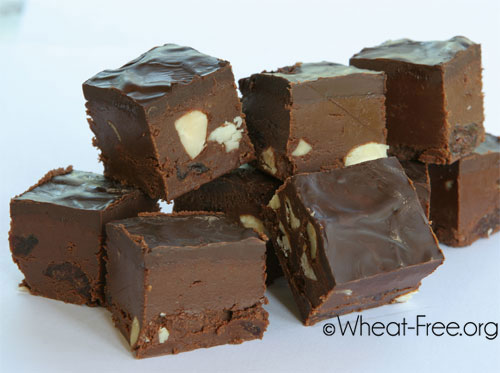
Chocolate cherry fudge recipe
“Sinfully rich and chocolatey, make this fudge for homemade Christmas gifts and wait for the compliments”

Allergy Information
| Wheat-Free | |
| Gluten-Free | |
| Nut-Free | |
| Dairy-Free | |
| Sugar-Free | |
| Vegetarian | |
| Vegan |
- Yield: makes 50-60 squares
A lot of people avoid trying to make fudge because they think it will be difficult, but it's really simple as long as you follow the stages and own a jam making thermometer.
It's not a 'make it and eat straightaway' recipe as you really need to let it set for several hours, but it's well worth the wait.
If you've got the chocolate making bug then why not make a batch of our white chocolate truffles and chocolate rum truffles at the same time for a really impressive homemade chocolates selection.
Please note: you will need a jam making thermometer for this recipe.
Ingredients
Chocolate fudge
Chocolate fudge topping
Directions
Preheat oven: 180°C, 350°F, Gas 4
- Line a baking tray 15cm x 25cm (6" x 10") with non-stick baking paper. This tray is for the fudge to be poured into to set.
- Line another baking tray with non-stick baking paper and spread the almonds over it. Put the almonds into the oven for 8 minutes, making sure that they do not get burnt. Then remove from oven and tip onto a chopping board to cool. When the almonds are cool cut up into rough chunks.
- Put the chopped almonds, grated chocolate (we used a food processor for quickness), sour cherries and butter into a large heatproof bowl. Put aside until the fudge sauce is made.
- To make the fudge sauce use a large heavy bottomed saucepan approximately 3.5 litres (6 pints) in capacity. The reason for such a big saucepan is that the fudge sauce will really boil up and could overflow a smaller pan, which would be extremely dangerous.
- Put the cream and sugar into the saucepan, then add the liquid glucose. The easiest way to handle liquid glucose is to heat a spoon in boiling water, then wipe it dry, and immediately spoon out the liquid glucose. You may need to repeat this process if more than one spoonful is needed.
- Place the saucepan over a very high heat and bring the ingredients to a really fast, rolling boil. You will need to stir continuously with a wooden spoon until it gets to that boiling point to ensure that everything is well mixed and combined together. As soon as the rolling boil is reached stop stirring because the mixture will start to burn on the bottom of the pan, and you don't want to scrape burnt bits into the fudge.
- Insert the jam making thermometer into the boiling fudge sauce. You will need to protect your hands when doing this as the fudge spits or may splash up, and the steam is also very hot. You now need to boil the fudge until the temperature reaches 110°C (225°F), this will take about 5 minutes, at this point the fudge sauce will look dark and thick.
- Remove the fudge sauce from the heat, and carefully pour it over the chocolate, almonds, cherries and butter. Do not scrape the bottom of the saucepan as the burnt bits will come out. Stir the chocolate mixture thoroughly with a wooden spoon until all the chocolate and butter has melted into the fudge sauce, and all the ingredients are well combined. The mixture should look shiny, with no chocolate or butter lumps present.
- Pour the fudge mixture into the prepared baking tin and smooth the top. Put boiling water into the saucepan and leave it to soak.
- Leave the fudge to cool until it is completely cold, then tightly cover it with clingfilm to avoid moisture getting inside, and put it in the refrigerator for 6-8 hours, or overnight.
- To decorate the fudge melt the milk chocolate in a heatproof bowl over a saucepan of simmering water, do not allow the base of the bowl to touch the water below. Spread the melted milk chocolate over the fudge. Allow to set slightly, then swirl the back of a spoon over the chocolate to make patterns and peaks in the chocolate. Leave to set.
- Remove the fudge from the tin and place on a chopping board. Cut the fudge into approximately 2.5cm (1") squares.
We stored the completed fudge in an airtight container, and left it at room temperature. If you refrigerate it for storage then the chocolate topping may bloom slightly (go white), but this should not spoil taste or enjoyment of the fudge.
